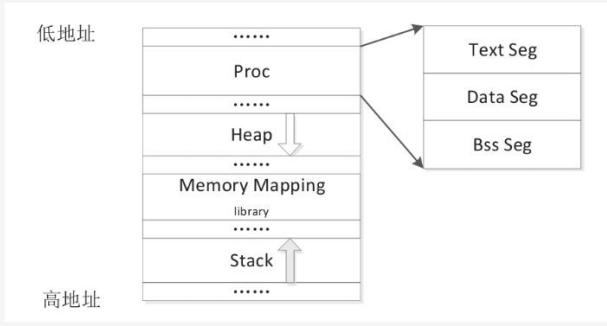
格式化字符串原理
1.format string
- print家族函数接受变长的字符串,其中第一个参数就是format string,后面的参数在实际运行中将与之对应
- format string符号说明
- %P 将对应的参数解析为地址形式输出
- %K$P 对应格式化字符串后的第K个参数,并以地址形式输出
- %K$n 与格式化字符串后的第K个参数对应,将参数解析为一个地址,并取消此次输出,而将已经输出的字节长度写入获取的地址
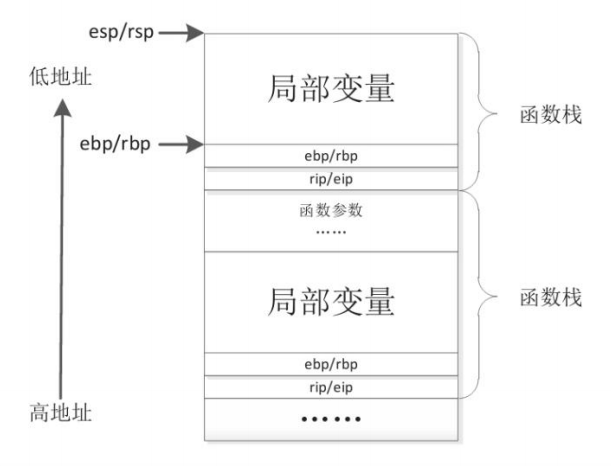
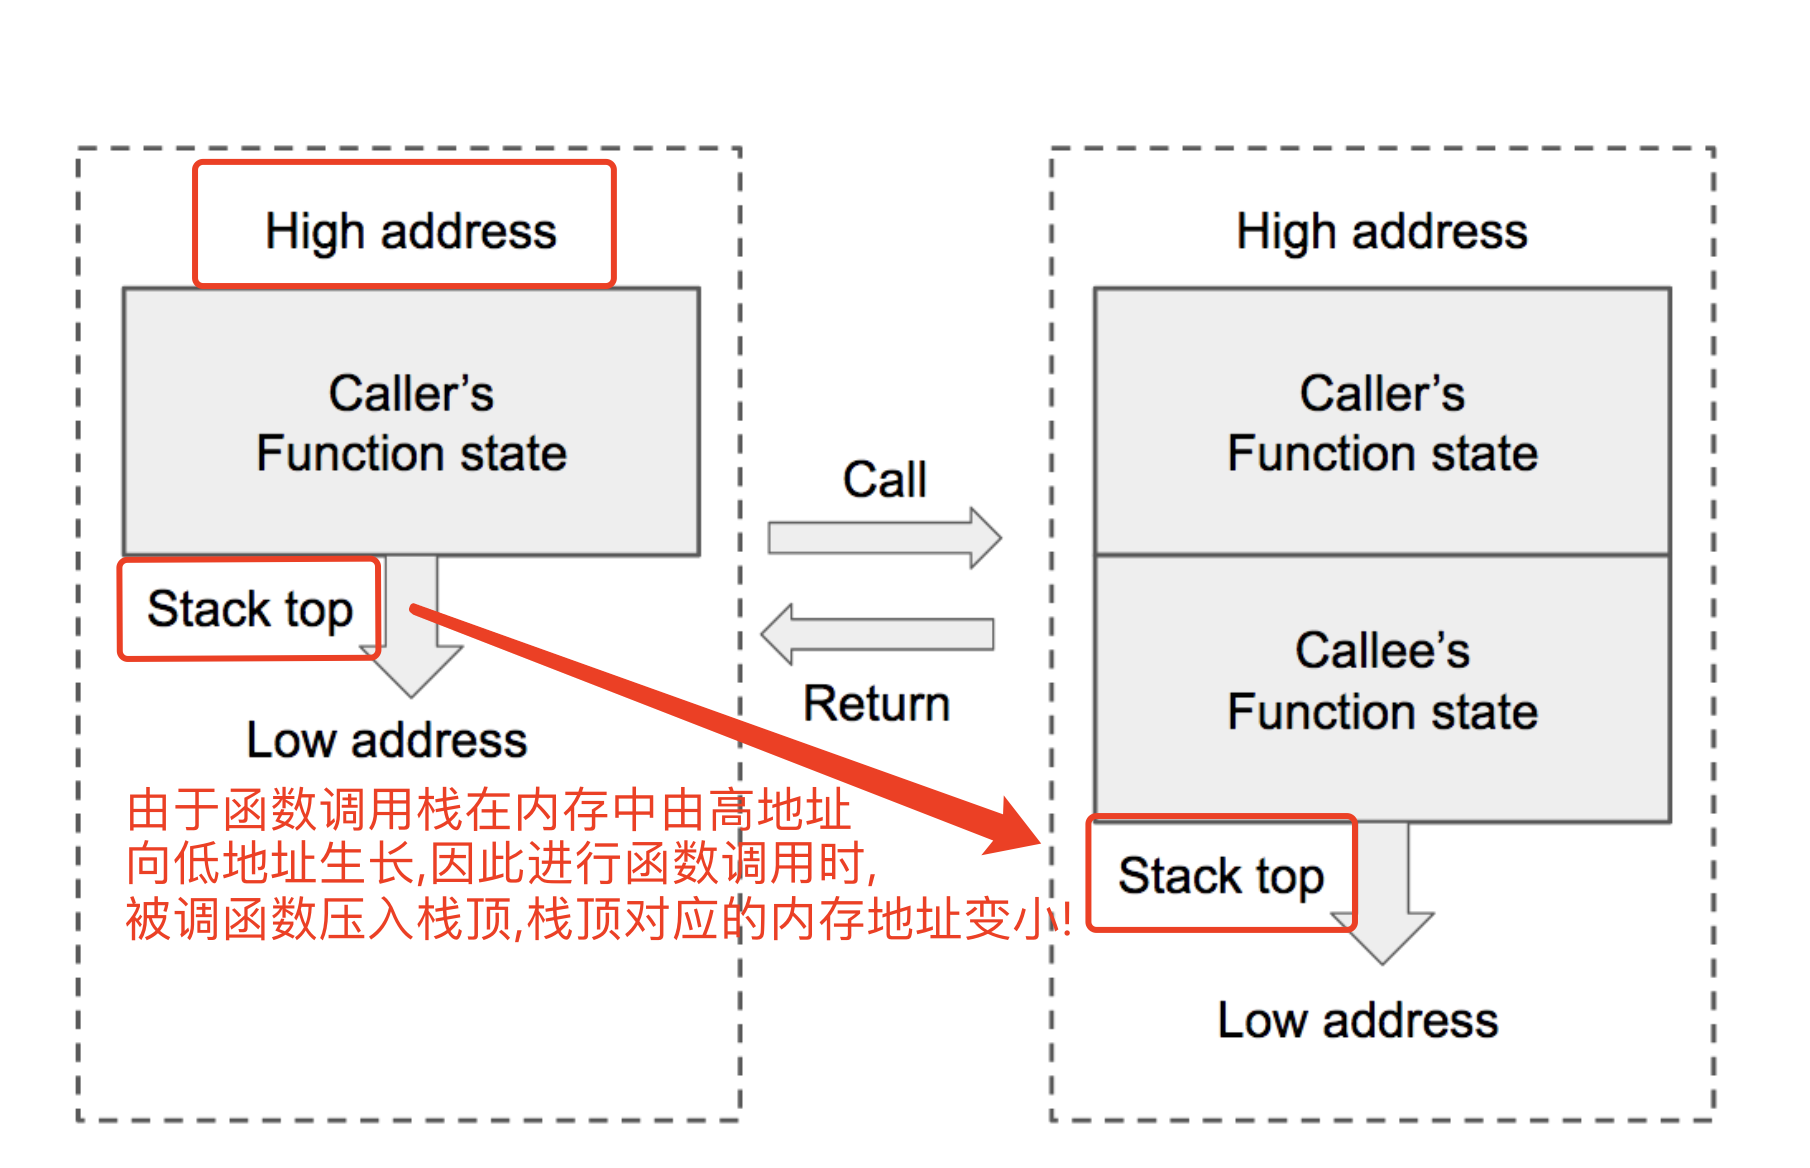
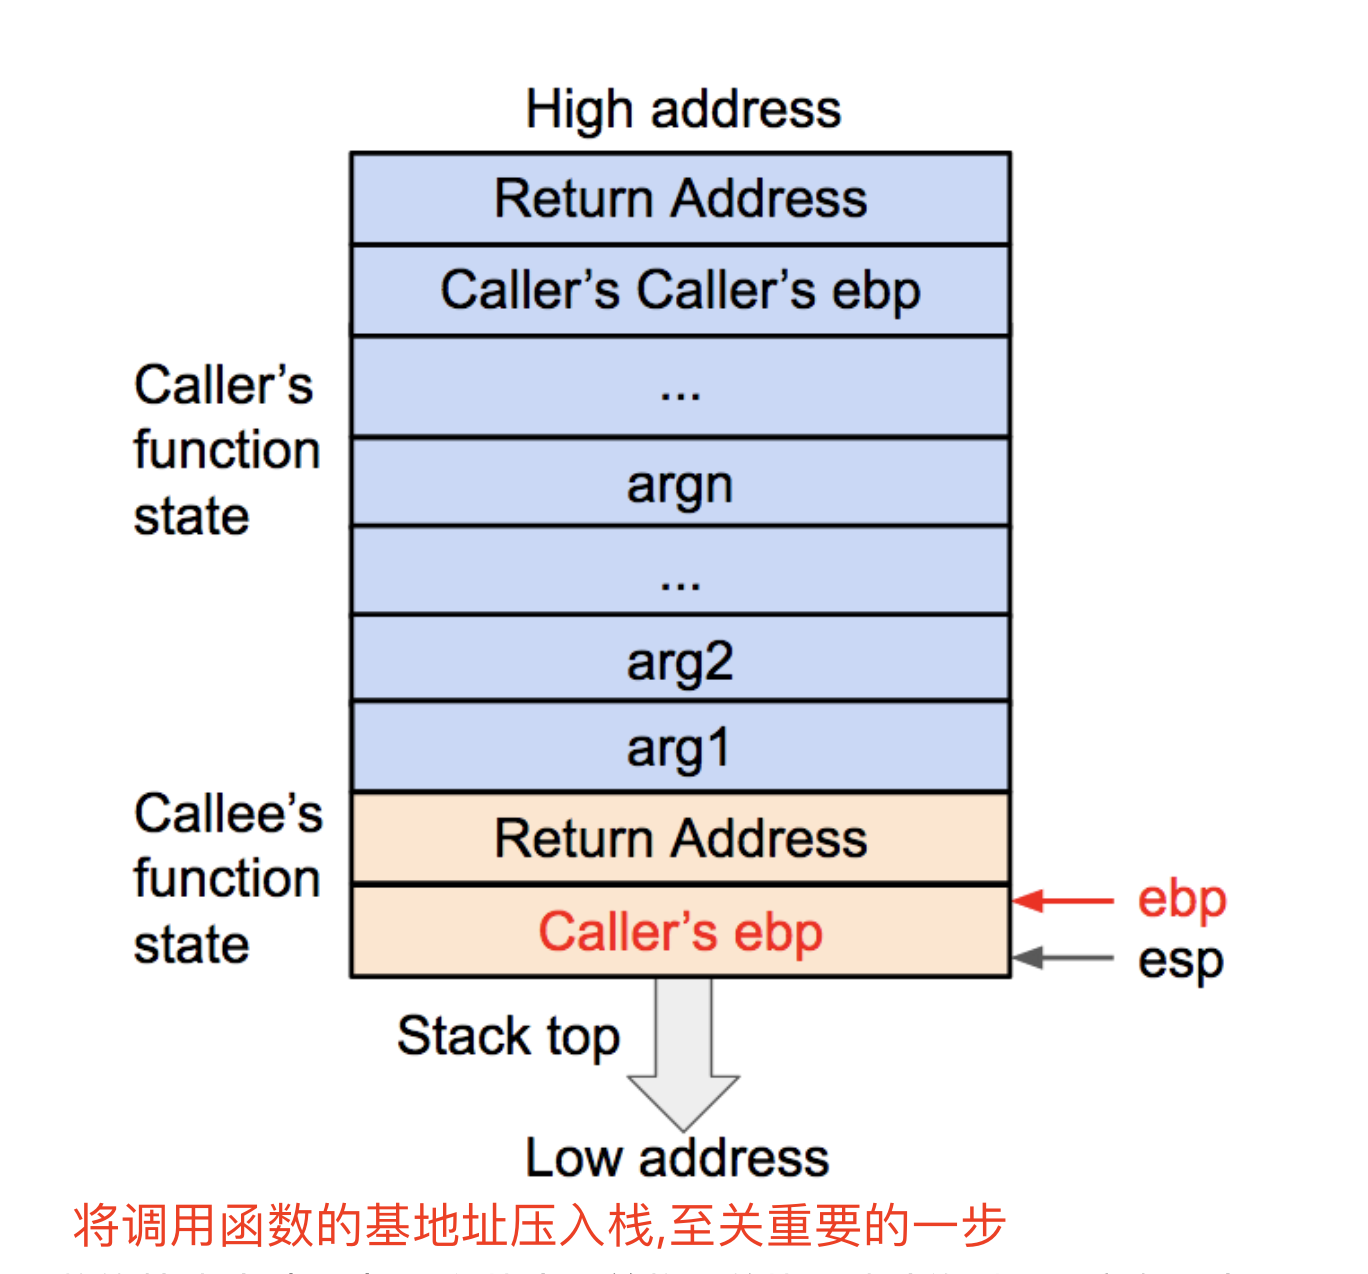
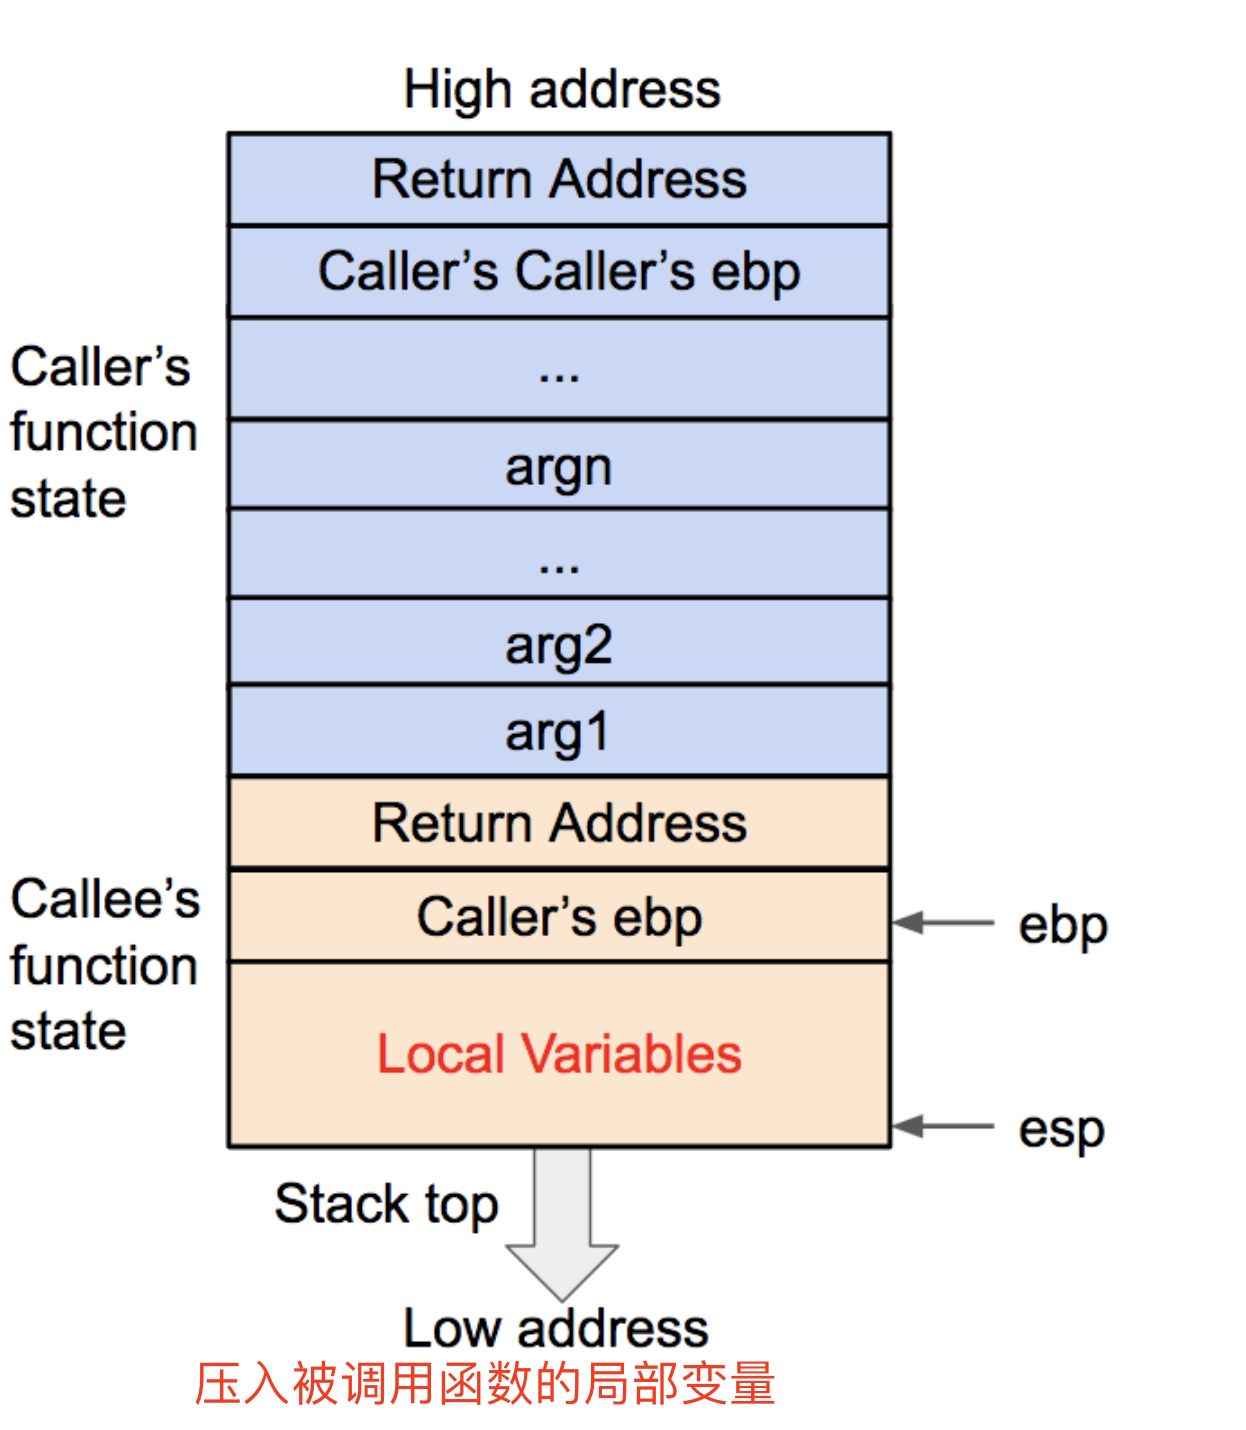
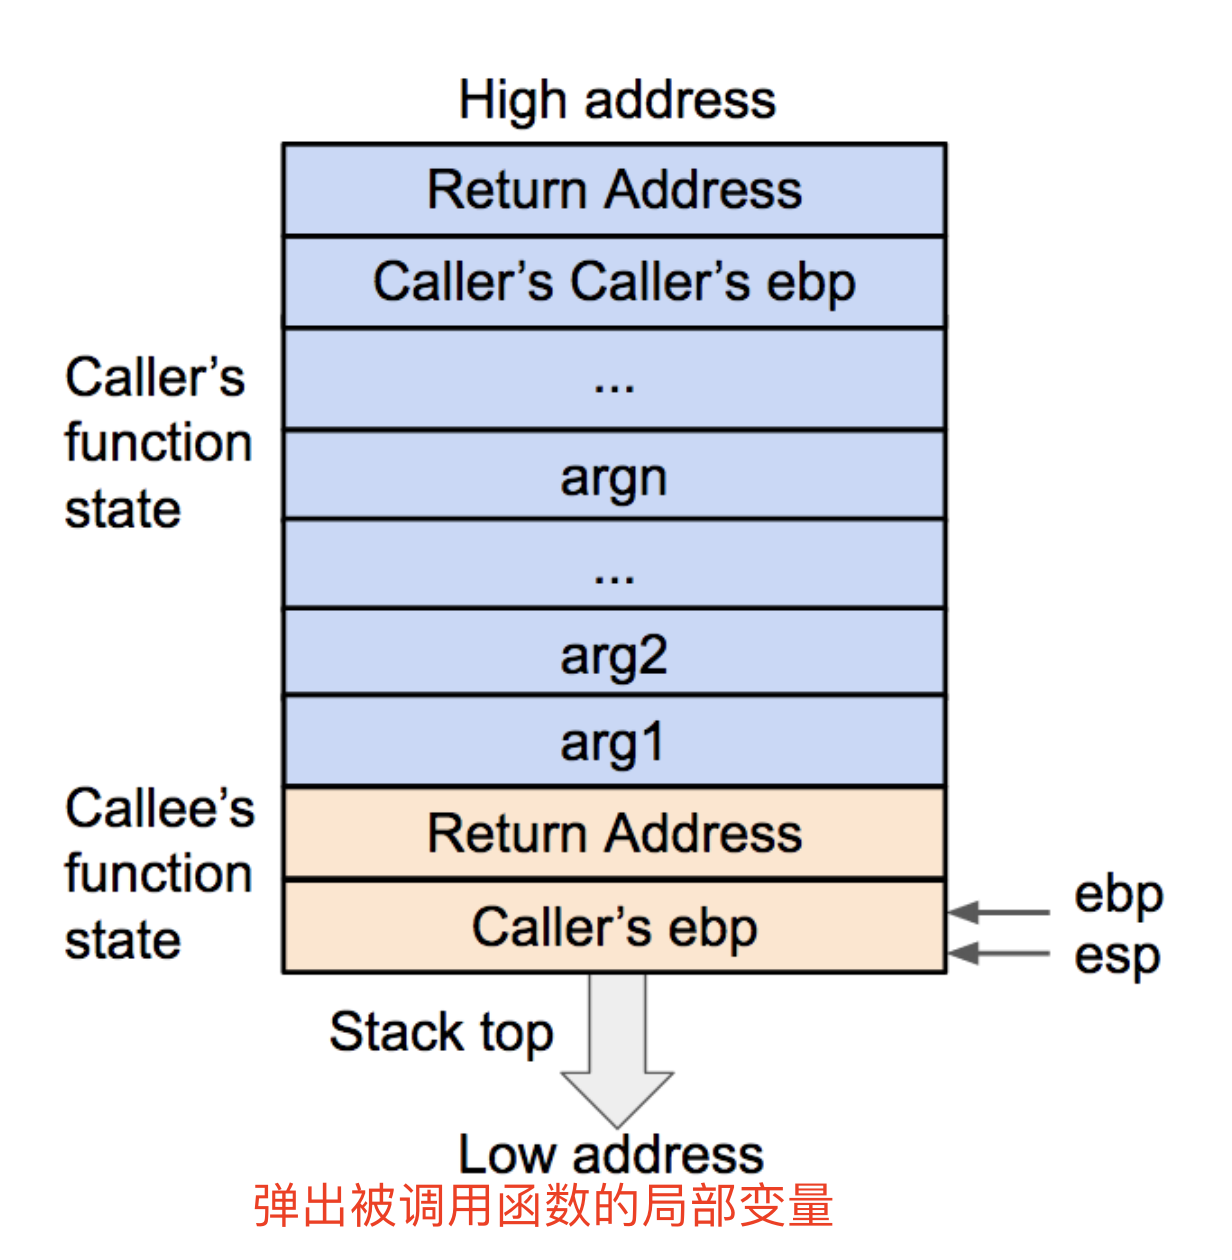
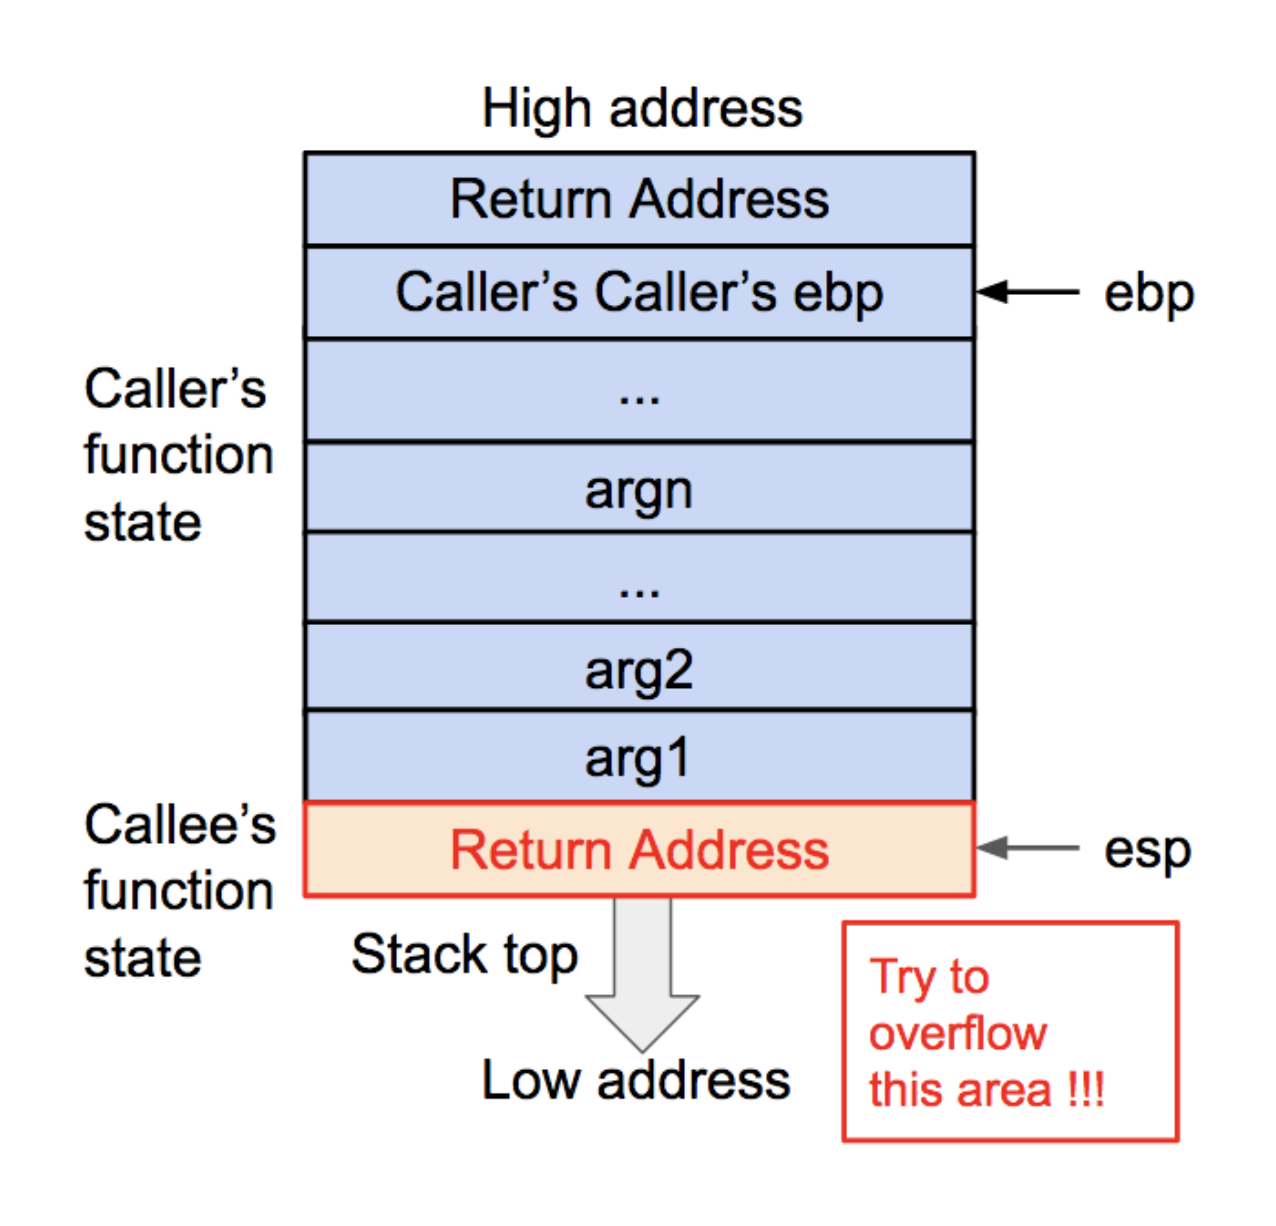
- 预调用约定
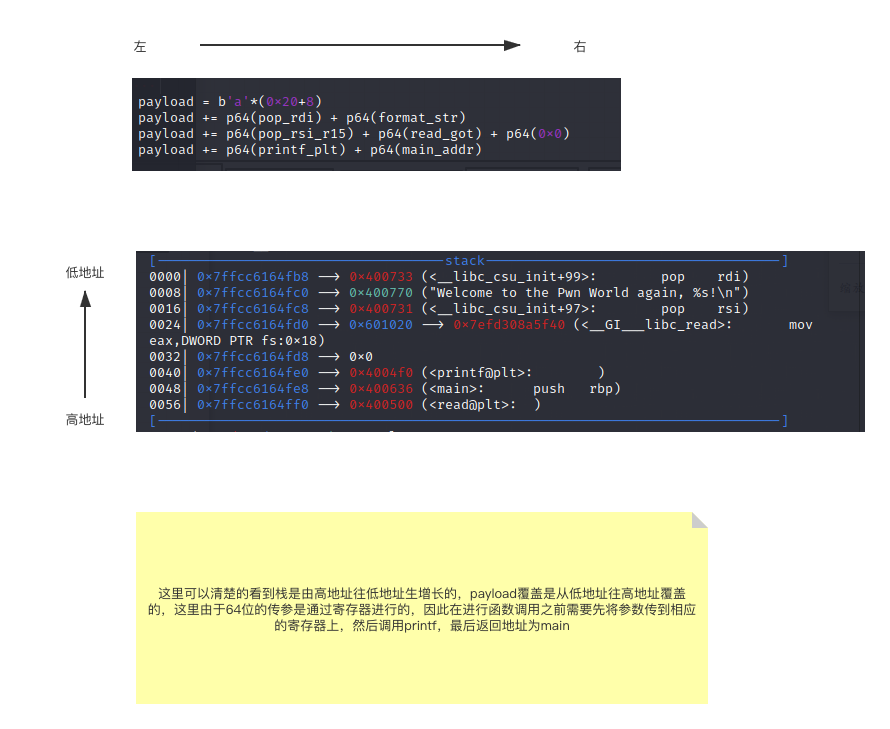
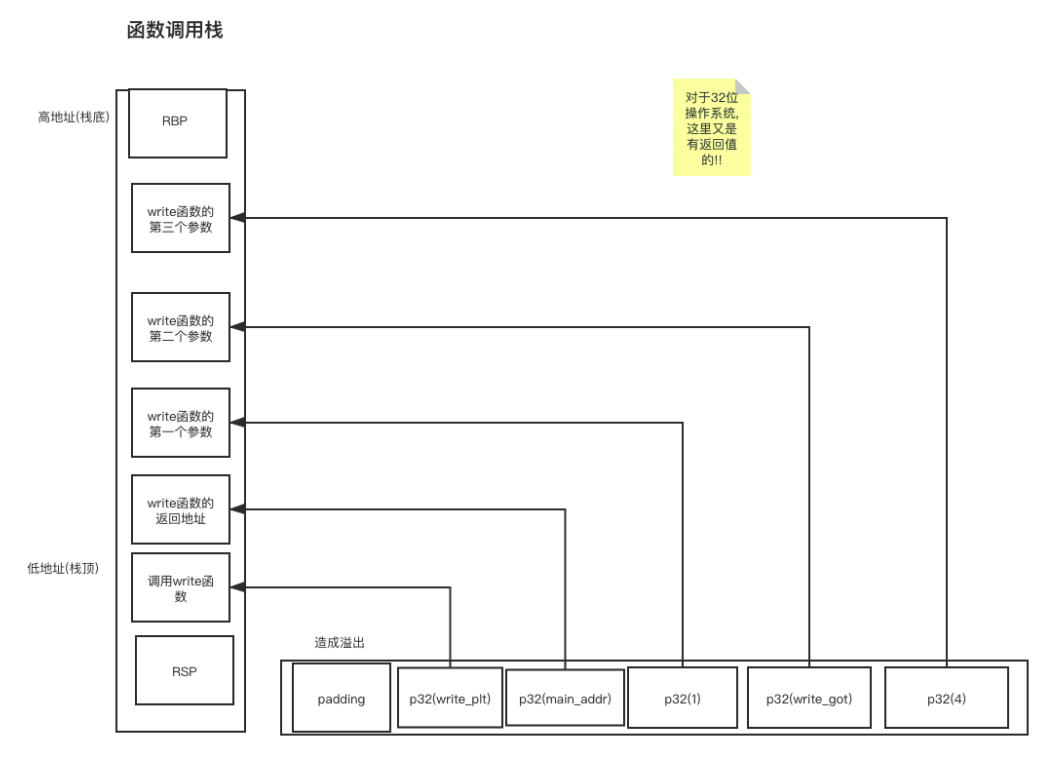
- printf的参数按照参数的顺序依次存放在栈上的(32位)
- 对于64位机,前六个参数存放在相应的寄存器中
2.格式化字符串漏洞
1.内存泄漏(%p)
- 当format string中的符号个数超过参数的个数时,printf会根据调用约定到,栈上(reg)中取值
- 因此当我们不向printf提供更多参数时,prinf会打印出栈上本不应该被访问的值
2.任意地址泄漏(%7$s)
- 类似这样的构造会造成栈上第 7+1 个参数,所在的地址被解析,读取该地址指向的字符串
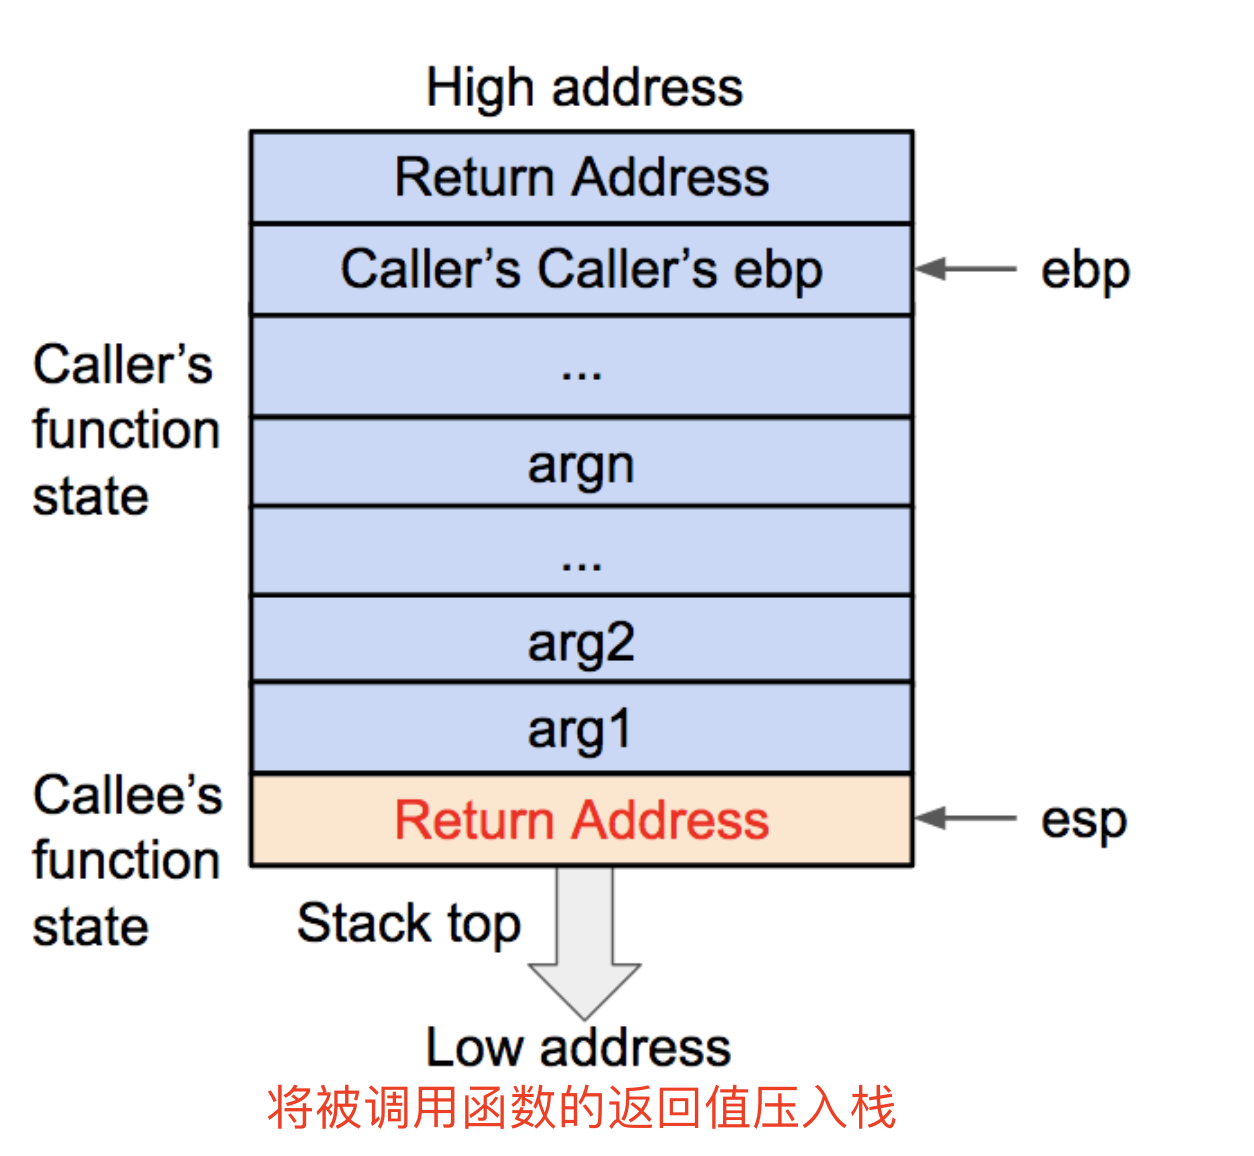
3. 内存覆盖(%k$n)
- 需要清楚的是把什么值输出到哪里去?
- 首先,写入的是%之前的字节数- 其次写入的目的地是?
- %n对当前偏移指向的那块空间存储的指针指向的空间写入数字,并取消此次输出
- 因此,写入的地址为,用户输入的地址des(当然,需要加偏移)
- 比如说你输入了一个地址,此时会有一个地址(tmp)储存你输入的地址(des),而format string 作为一个参数,在函数栈中是有地址的,而由于格式化符号大于输入参数的个数,因此函数栈中会有很多的地址存储,因此需要通过偏移量找到用户输入的地址(des),并向des指向的空间写入%之前的字节数
- 其次写入的目的地是?
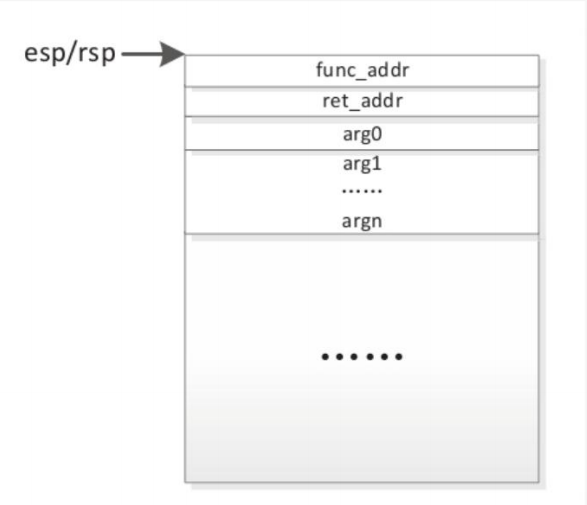
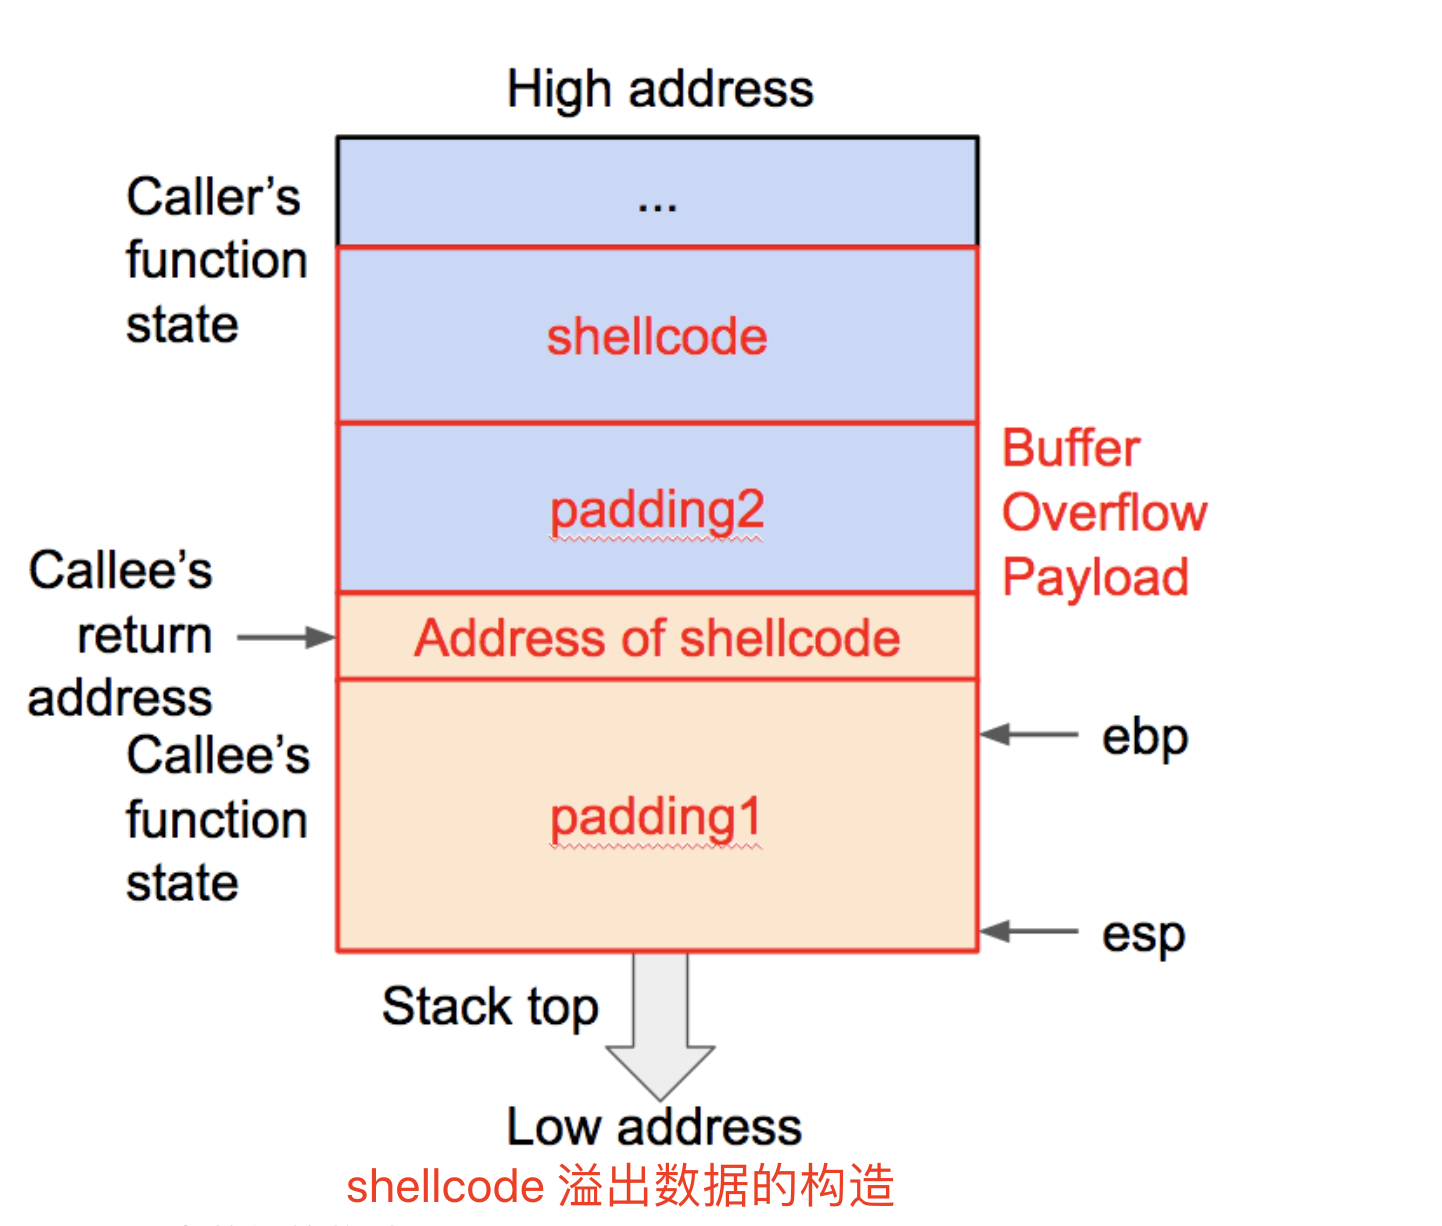
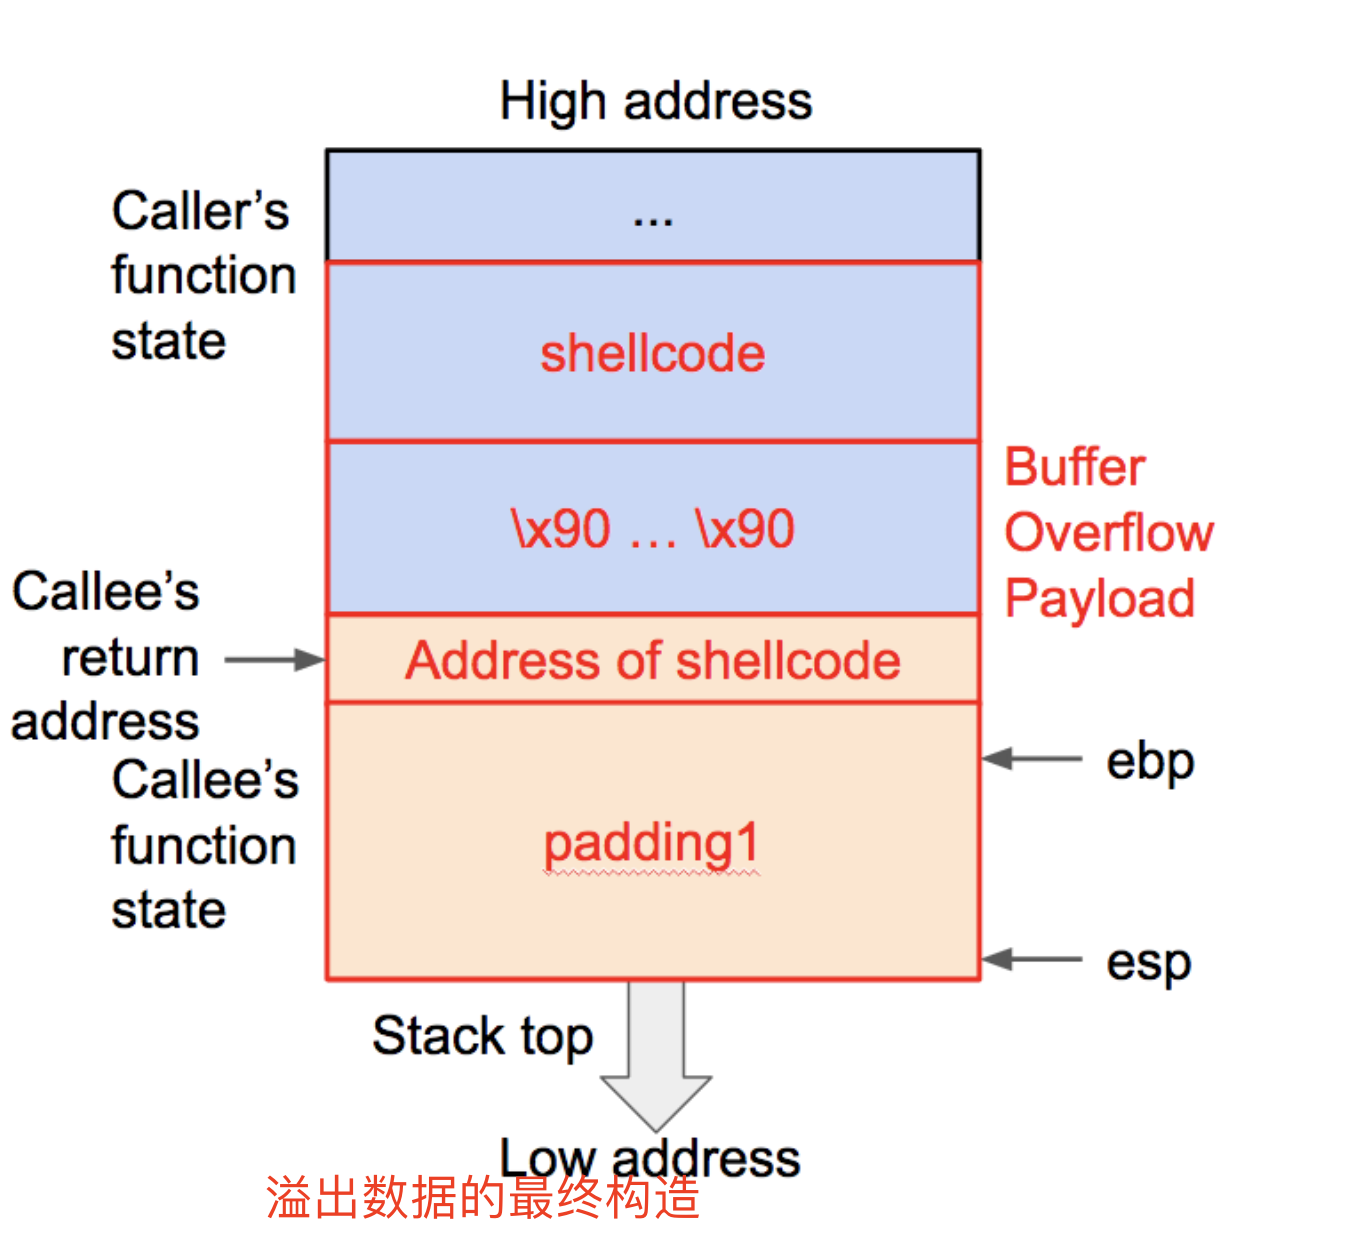
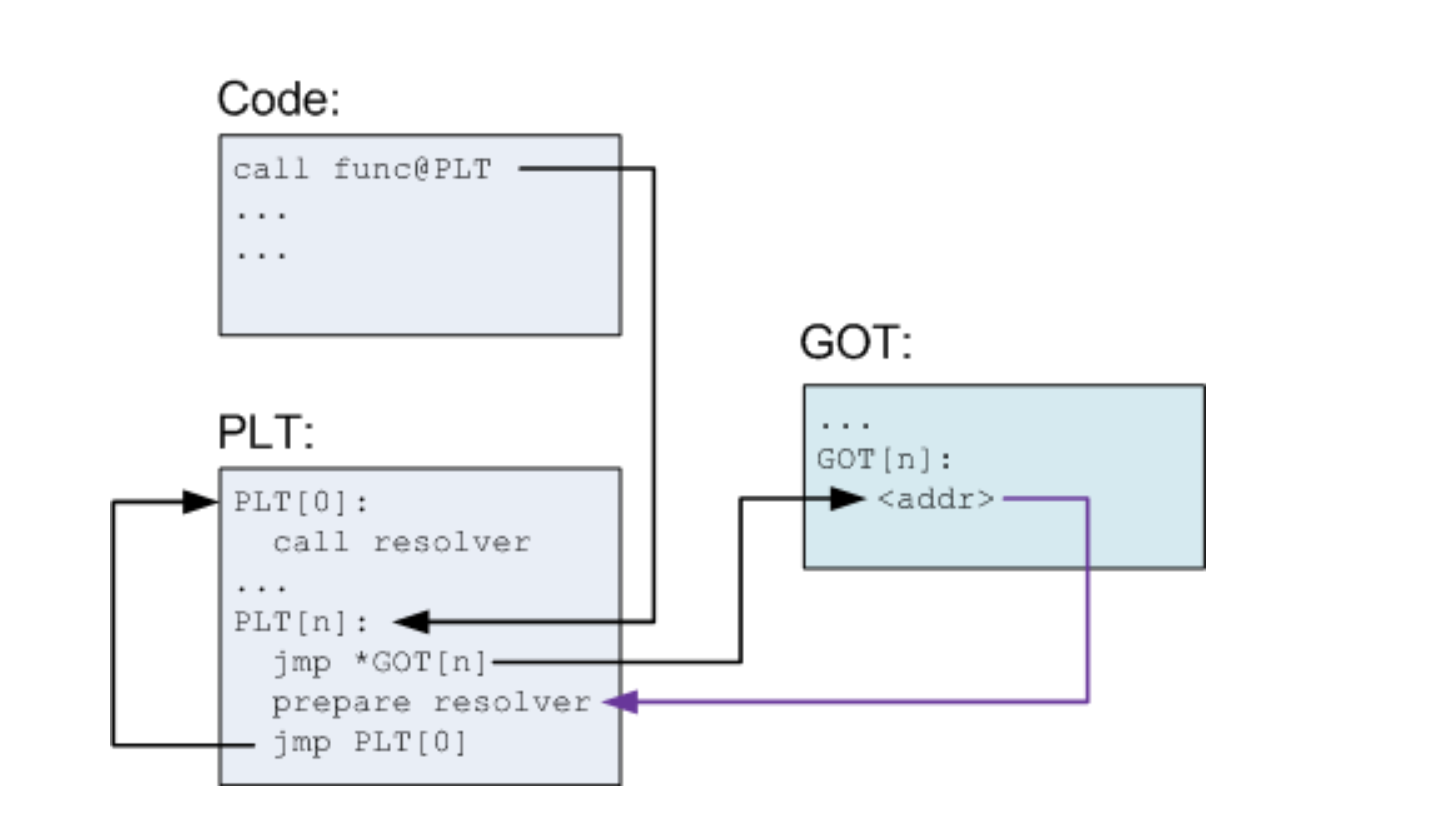
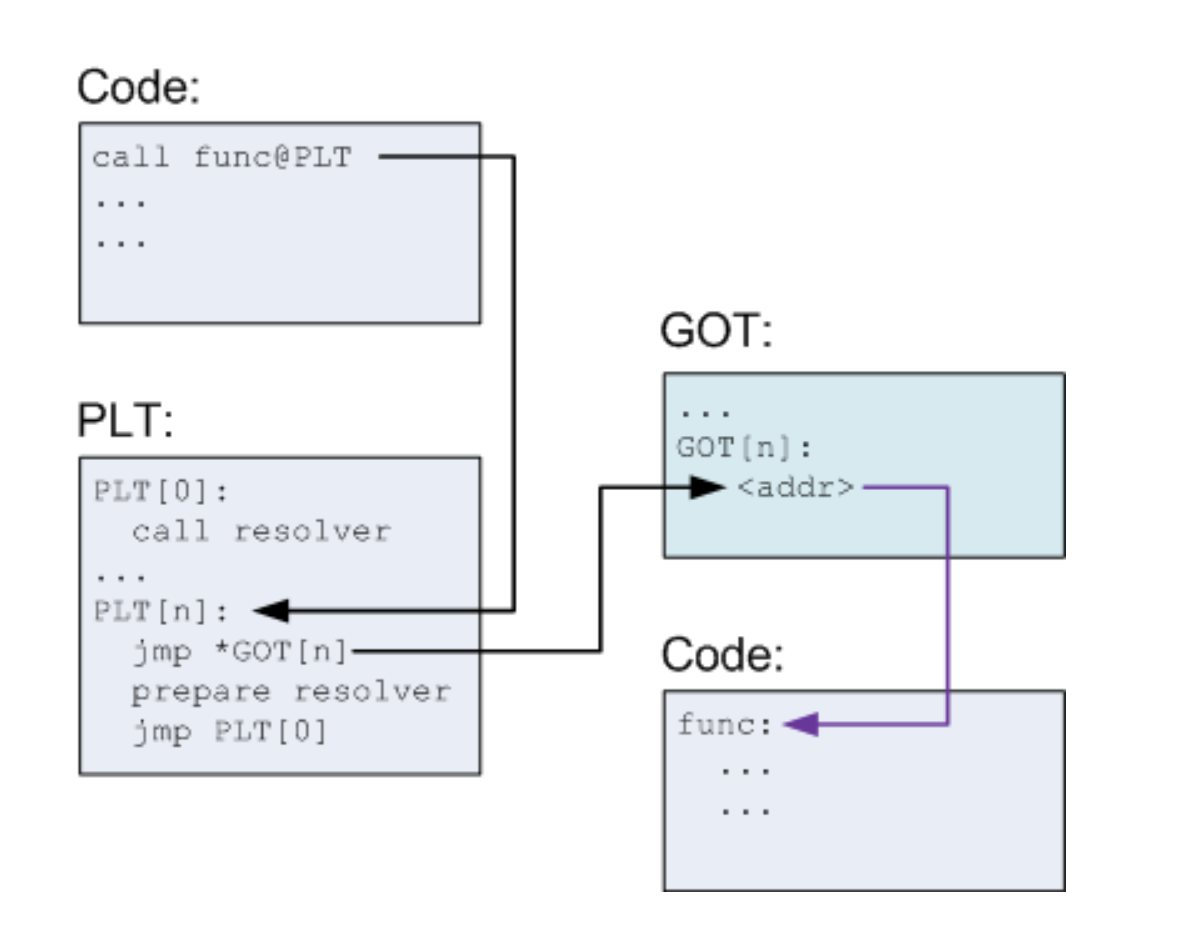
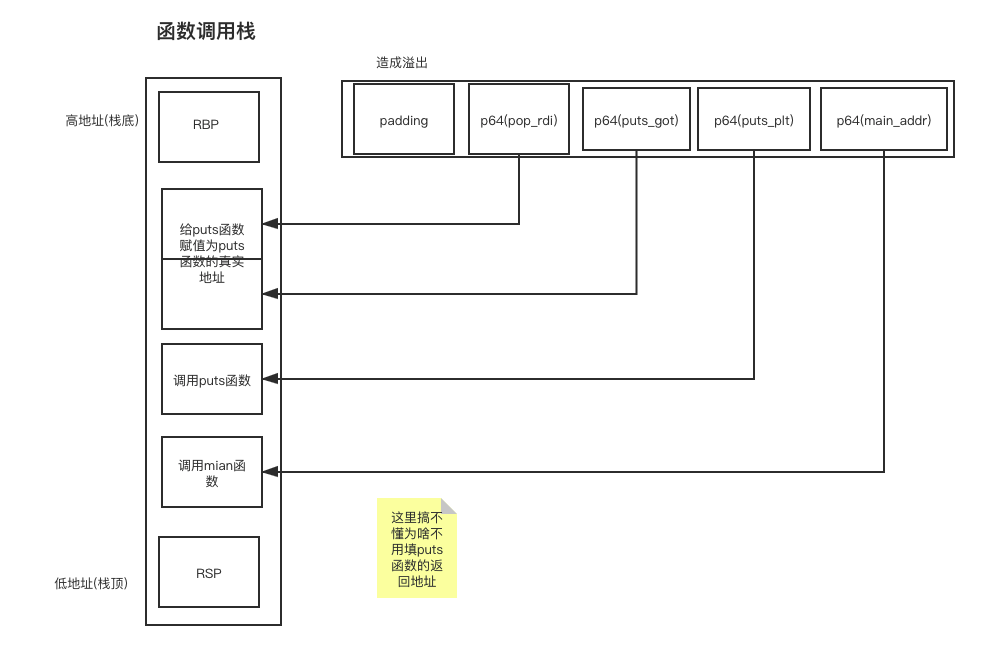
实现任意地址写入
如何实现向任意地址写入任意字符串?
1
payload=fmtstr_payload(10,{atoi_got:system_plt})
4.各种格式化字符含义
%c:输出字符,配上%n可用于向指定地址写数据。
%d:输出十进制整数,配上%n可用于向指定地址写数据。
%x:输出16进制数据,如%i$x表示要泄漏偏移i处4字节长的16进制数据,%i$lx表示要泄漏偏移i处8字节长的16进制数据,32bit和64bit环境下一样。
%p:输出16进制数据,与%x基本一样,只是附加了前缀0x,在32bit下输出4字节,在64bit下输出8字节,可通过输出字节的长度来判断目标环境是32bit还是64bit。
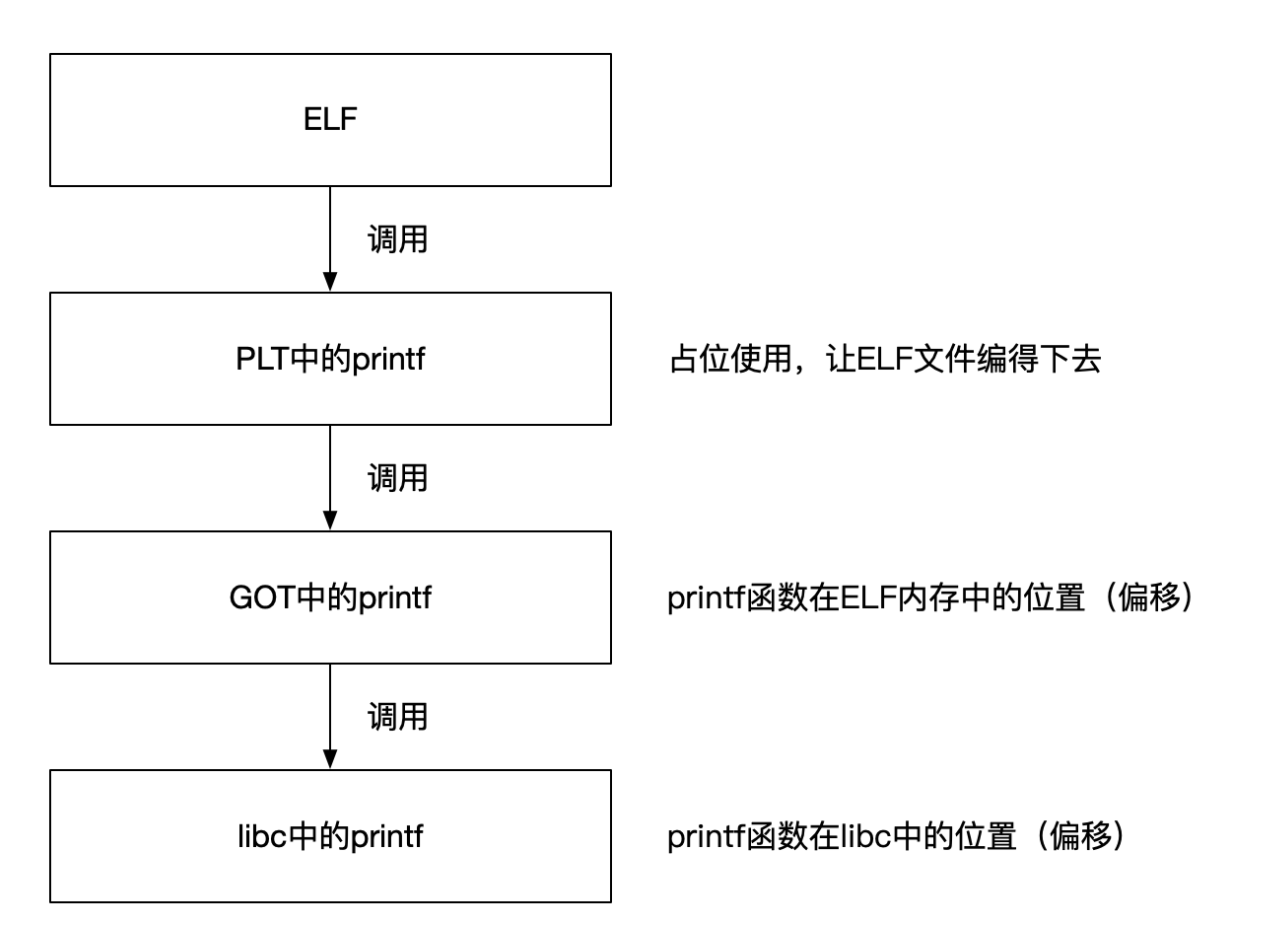
%s:输出的内容是字符串,即将偏移处指针指向的字符串输出,如%i$s表示输出偏移i处地址所指向的字符串,在32bit和64bit环境下一样,可用于读取GOT表等信息。
%n:将%n之前printf已经打印的字符个数赋值给偏移处指针所指向的地址位置,如%100x%10$n表示将0x64写入偏移10处保存的指针所指向的地址(4字节),而%$hn表示写入的地址空间为2字节,%$hhn表示写入的地址空间为1字节,%$lln表示写入的地址空间为8字节,在32bit和64bit环境下一样。有时,直接写4字节会导致程序崩溃或等候时间过长,可以通过%$hn或%$hhn来适时调整。
3.实例
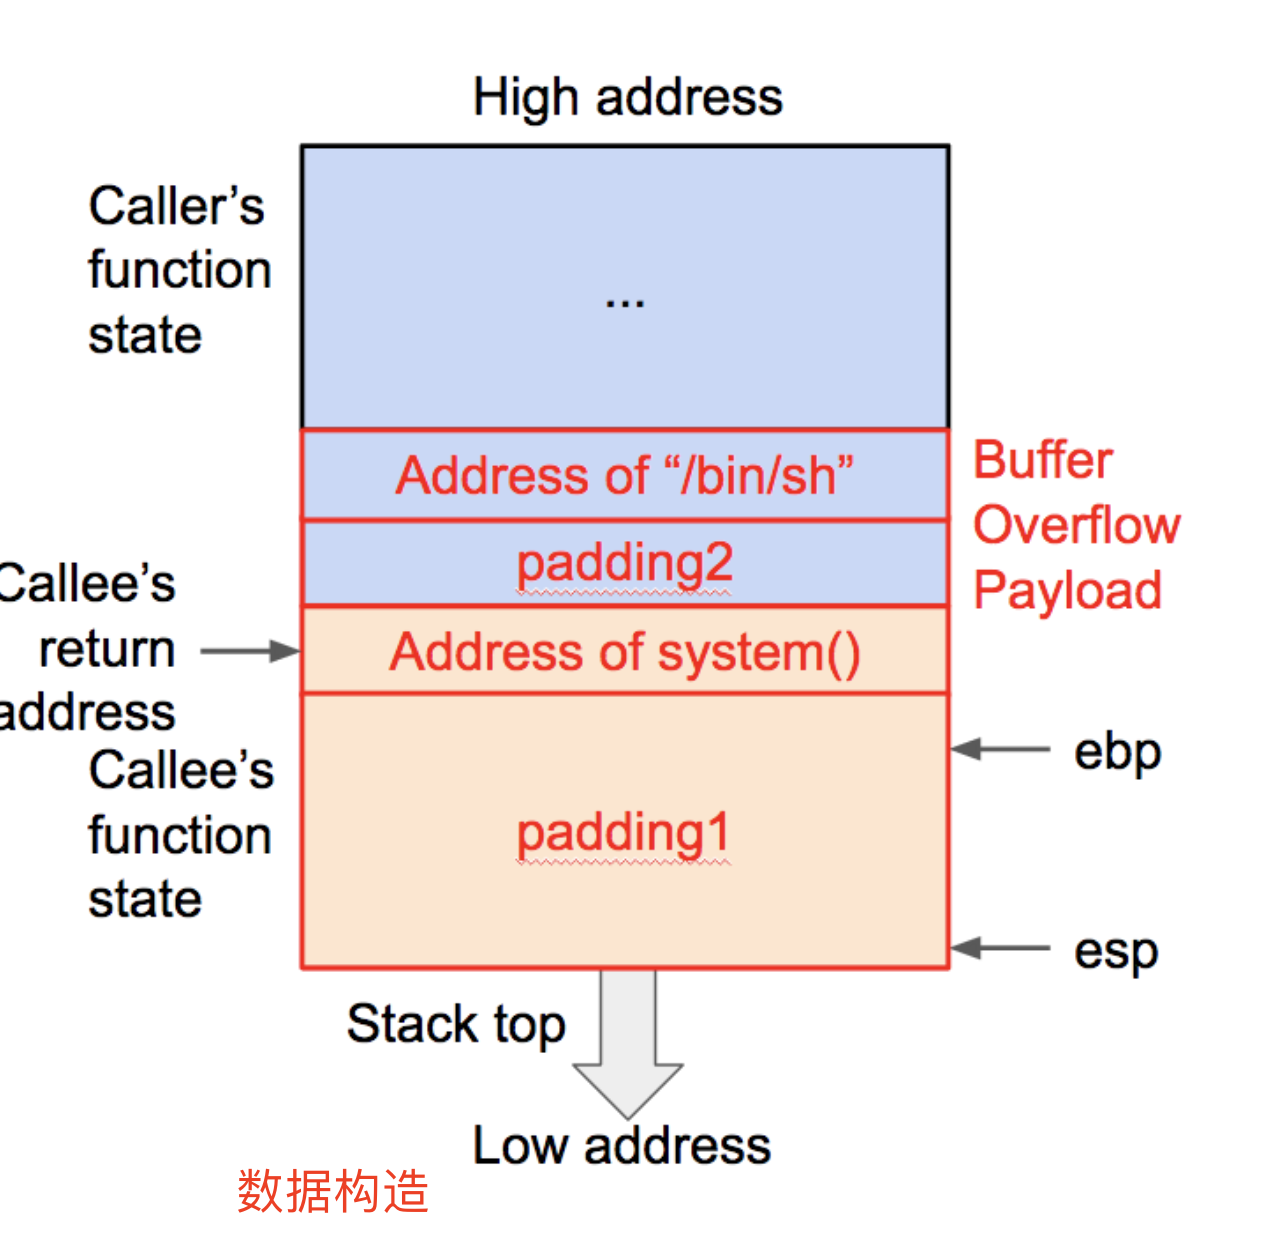
1.向got表中写入system的plt地址
1 | from pwn import * |
2.向某个空间写入具体数据
1 | from pwn import * |